Elearning School Pro Documentation
Your awesome theme / template documentation
Introduction
- Theme Name : Elearning School Pro
- Author : mishkatwp
- Support Forum : https://www.mishkatwp.com/support/mishkat-wp/
- License : GNU General Public License v3 or later
- Description : The School WordPress Theme is a premium, feature-packed theme specifically designed for educational institutions, schools, universities, and e-learning platforms. It combines a clean, minimalist design with a sophisticated, user-friendly interface, making it ideal for institutions that want to establish a professional and engaging online presence. This theme is highly versatile, catering to the needs of traditional universities, smart campus initiatives, and online university programs, allowing institutions to promote degree programs, student support services, and specialized courses. It offers the flexibility required for managing academic information, faculty profiles, course offerings, and other essential features of an educational website. The School WordPress Theme is fully responsive and retina-ready, ensuring that the website provides a smooth and seamless user experience across all devices, from desktops to smartphones. Its mobile-first design is especially beneficial for engaging students, parents, and faculty on the go. Additionally, the theme includes visual elements like customizable image/video galleries, custom banners, and a clean, intuitive layout, which can be used to highlight university achievements, student testimonials, academic excellence, and special events. These features help create a visually appealing and content-rich website that engages visitors and showcases the educational institution’s strengths. The theme ensures that your institution stands out in the competitive world of education, offering a modern, professional online experience for all users.
How to Establish the Theme
Setup Theme
Template installation is very simple process.
You can also install your theme using WP Admin
he first task is to log in to your WordPress admin area. Next, click on
1. In dashboard click on Appearance >> Themes

2. Click on the Add New button at the top of the themes page once page is loaded
3. Click the button labelled as 'Upload Theme'.

Select the elearning-school-pro.zip theme from the Browse Button, then click the Install Now button

5. WordPress will now install your theme and display a success message, as well as a link to activate or to see the live preview. Congratulations on completing the installation of your theme.
Demo Importer -
Follow below instructions to setup photography-album-pro theme.
In the Dashboard, go to Appearance >> Elearning School Pro Themes Setup
Once you are on the Elearning School Pro themes setup, click on the start button.

As the demo importer process finish then check your site, all the content will imported and theme will display like live demo.
Necessary Plugins
When you initially activate the theme, you'll be asked to install these plugins on your Dashboard. You can ignore the message if you don't want to install these plugins on theme activation, and if you change your mind later, you can install them manually.
In the Dashboard, click on Plugins >> Install Plugins.
Kirki
Plugin download link kirki
Contact Form 7
Plugin download link contact-form-7
WooCommerce
Plugin download link WooCommerce
Elearning School Pro Custom Posttype
Plugin download link Elearning School Pro Custom Posttype
Menu Setup
Menu Setup
In the dashboard, go to Appearance >> Menu
From the 'Appearance' menu on the left-hand side of the Dashboard, select the 'Menus' option to bring up the Menu Editor.
Select Create a new menu at the top of the page. Enter a name for your new menu in the Menu Name box. Click the Create Menu button.
Your new custom menu has now been defined.

Adding Items to a Menu
Select the Pages that you want to add by clicking the checkbox next to each Page's title.
Click the Add to Menu button located at the bottom of this pane to add your selection(s) to the menu that you created in the previous step.
Click the Save Menu button once you've added all the menu items you want.
Your custom menu has now been saved.

In front end, it will look like this.

Elearning School Pro Theme Setup
Top Header
In order to proceed with you can set contact number, text content so follow the instructions given below.
In the Dashboard, go to Appearance >> Customize >> Theme Options >> Header Settings

In front end, it will look like this.

Logo Setup
In order to proceed with Theme Logo setup, you can set site title and tagline, follow the instructions given below.
In the Dashboard, go to Appearance >> Customize >> Site Identity >> Logo Or Set Title and Tagline You can also Enable / Disable Site Title and Tagline
In front end, it will look like this.
Slider Section
Slider Settings
In order to proceed with Theme Slider Settings , you can set slide show , follow the instructions given below.
In the Dashboard, go to Appearance >> Customize >> Theme Options >> Slider Settings
Select number slides to show. You can set heading and content. You can choose from this options for each slider option.
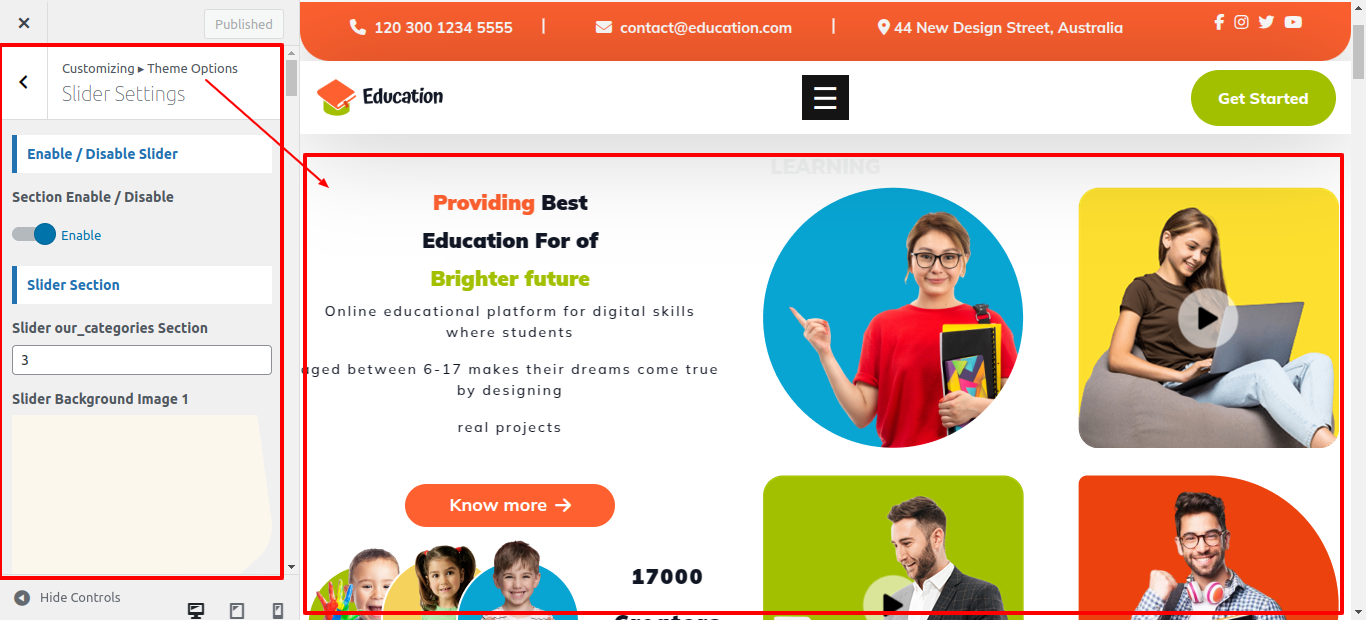

In front end, it will look like this.

Library Settings
Library Settings
In order to proceed with Library Settings follow the instructions given below.
In the Dashboard, go to Appearance >> Customize >> Theme Options >> Library Settings


In front end, it will look like this.

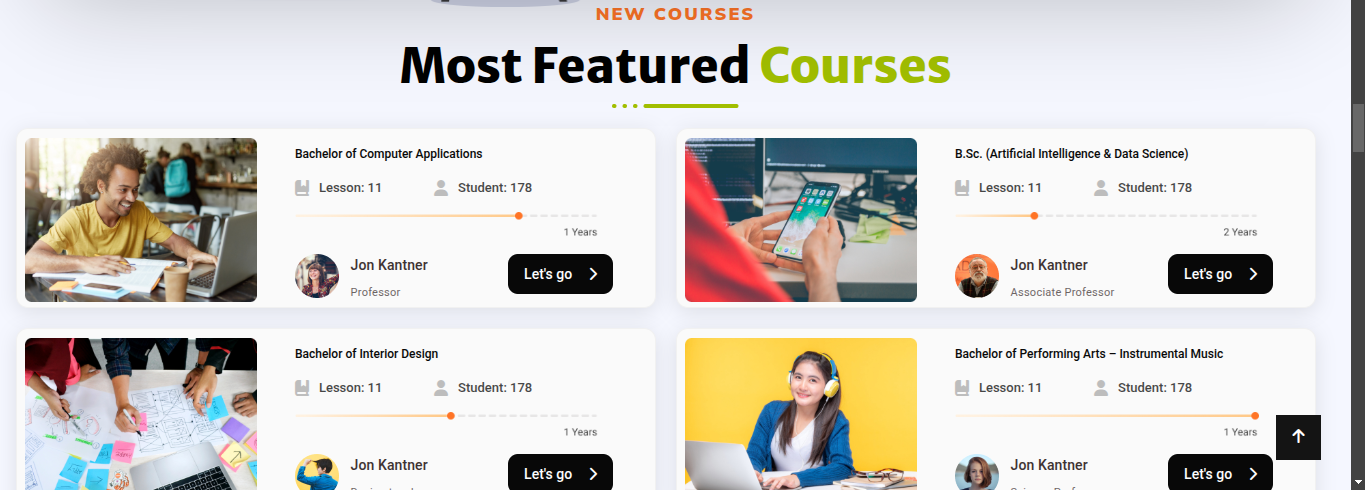
Popular Courses Settings
Popular Courses Settings
To proceed with Post, you should first choose the post title,featured image choose the category in which you want your post to appear.
Follow the instructions given below to setup Popular Courses.
In the Dashboard, go to Popular Courses >> Add New Post
You can make multiple posts for Popular Courses.

In order to proceed with Popular Courses Settings follow the instructions given below.
In the Dashboard, go to Appearance >> Customize >> Theme Options >> Popular Courses Settings
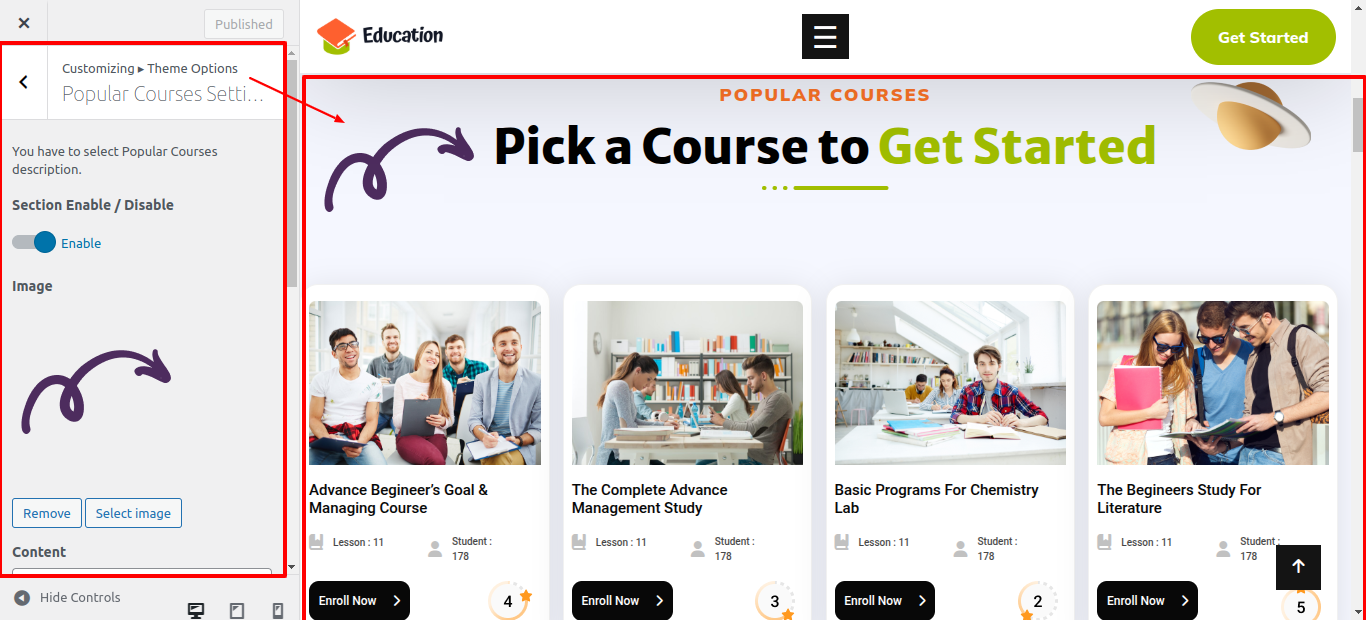
In front end, it will look like this.

Choose Us Settings
Choose Us Settings
In order to proceed with Choose Us Settings follow the instructions given below.
In the Dashboard, go to Appearance >> Customize >> Theme Options >> Choose Us Settings
Once you have done with this you will see the post on your front page.
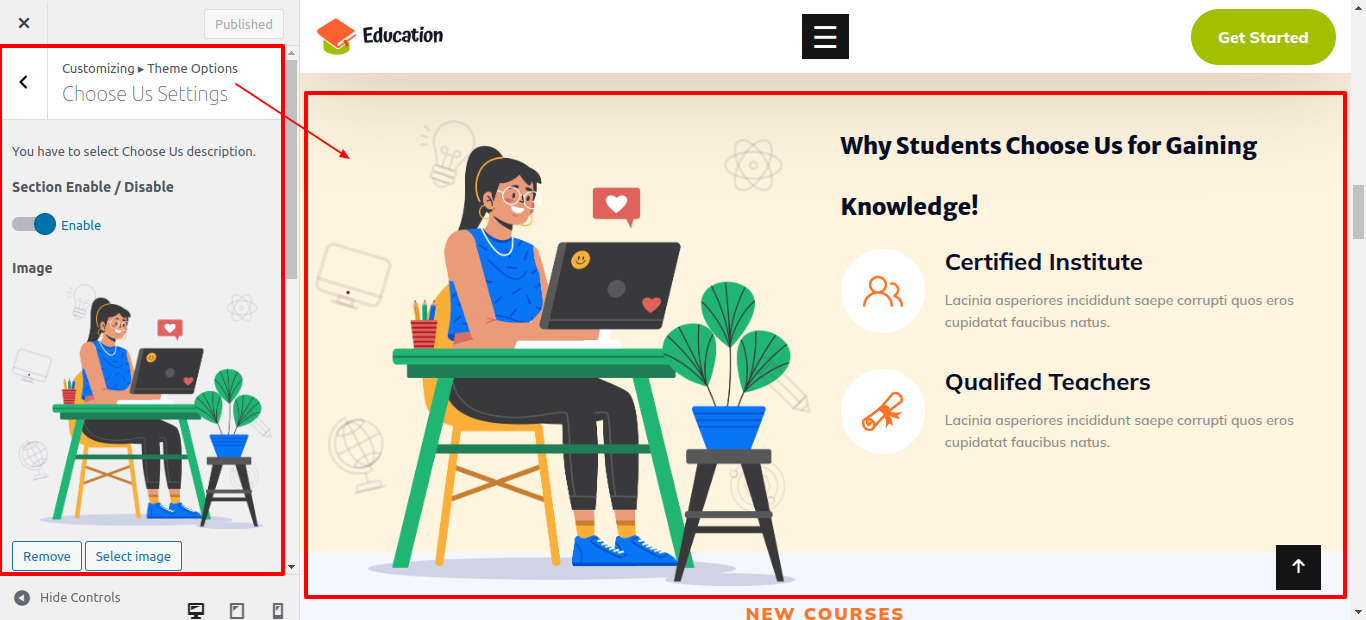

In front end, it will look like this.

New Courses Settings
New Courses Settings
To proceed with Post, you should first choose the post title,featured image choose the category in which you want your post to appear.
Follow the instructions given below to setup New Courses.
In the Dashboard, go to New Courses >> Add New
You can make multiple posts for New Courses.

In order to proceed with New Courses Settings follow the instructions given below.
In the Dashboard, go to Appearance >> Customize >> Theme Options >> New Courses Settings
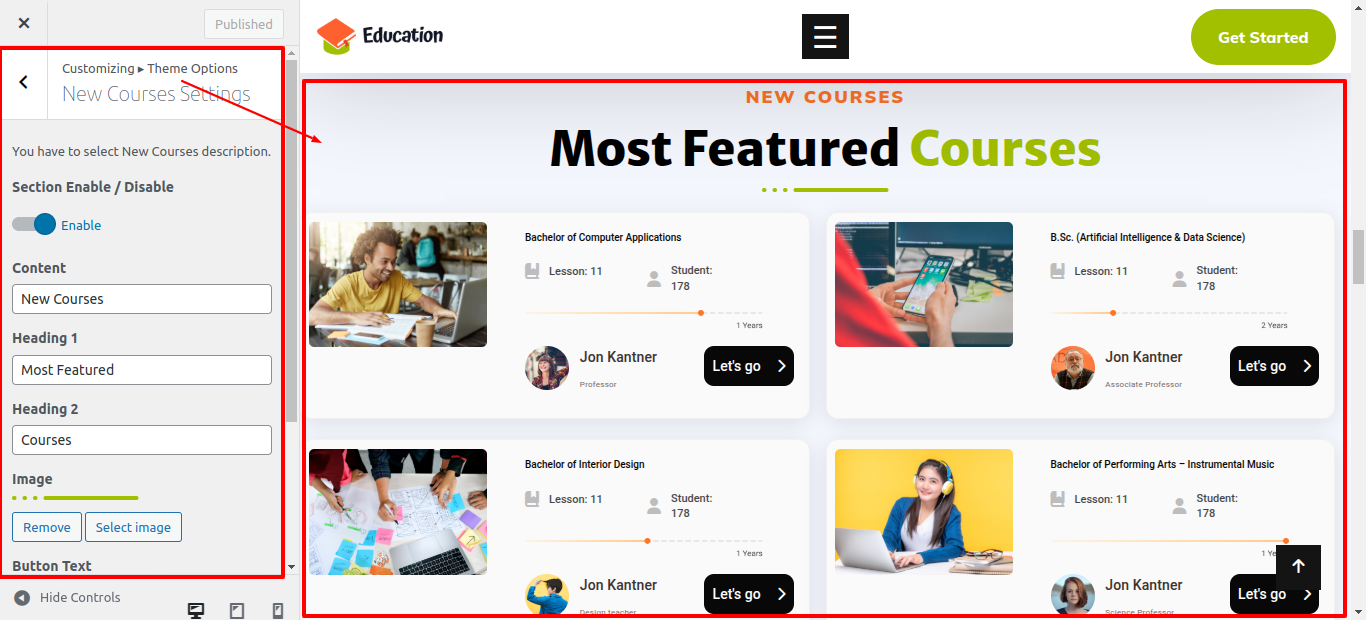
In front end, it will look like this.
Newsletter Settings
Newsletter Settings
To proceed with Contact form, you should first install the contact-form-7 plugin.
Follow the instructions given below to setup Newsletter.
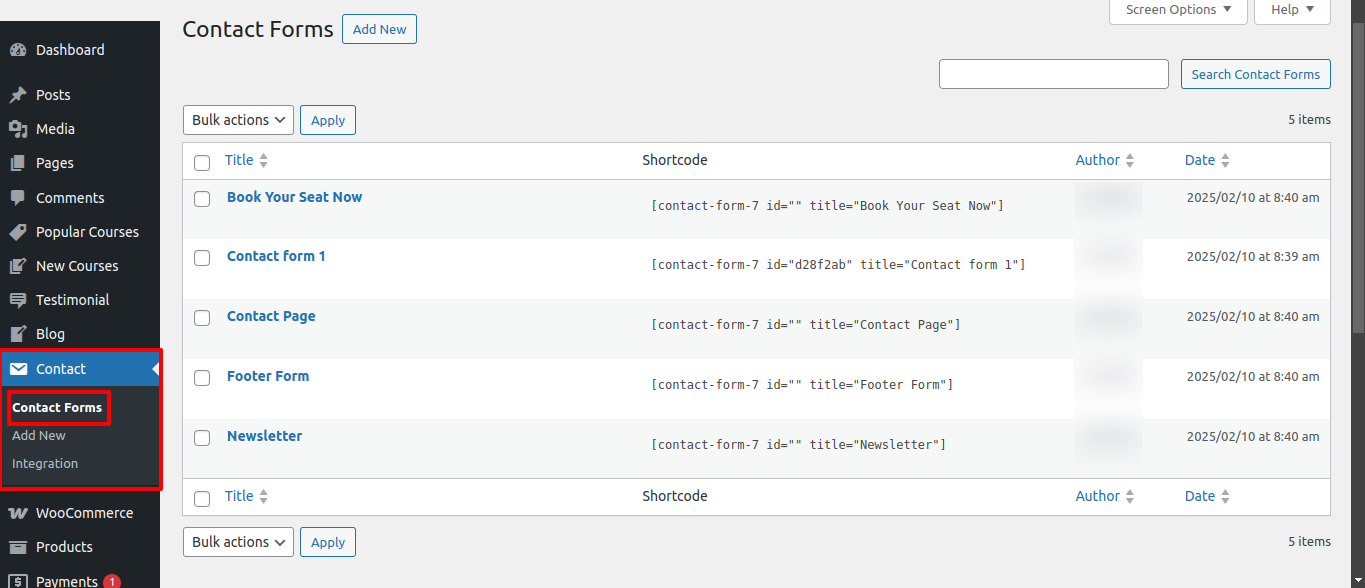
In the Dashboard, go to Contact >> Contact Forms >> Newsletter
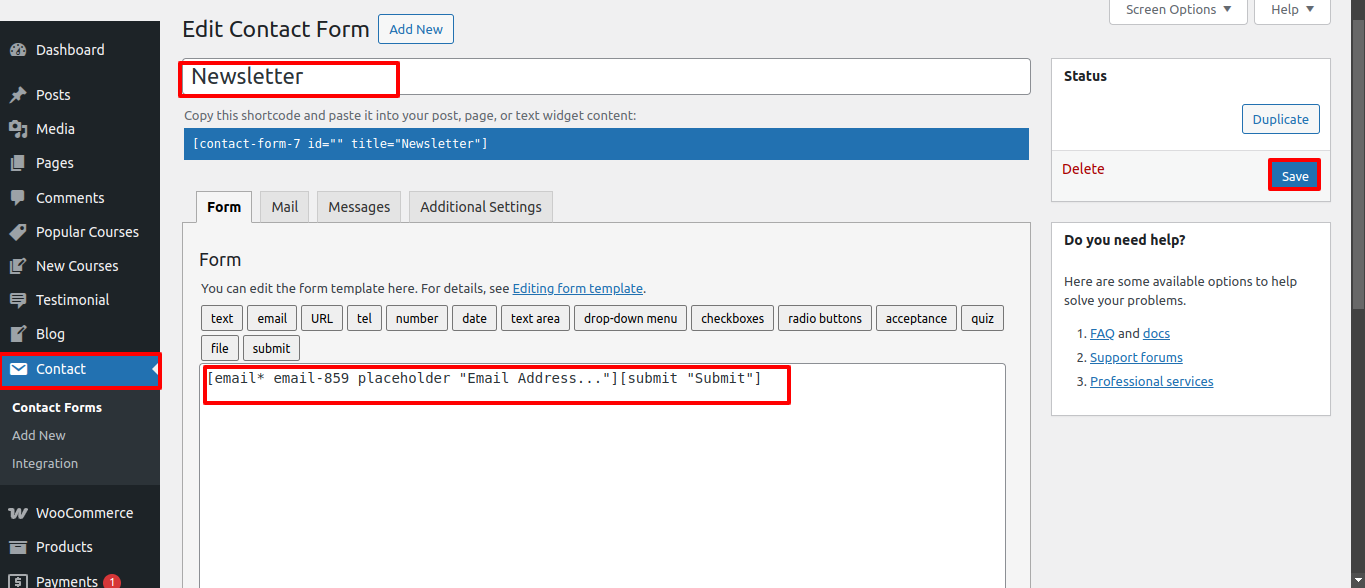
In order to proceed with Newsletter Settings follow the instructions given below.
In the Dashboard, go to Appearance >> Customize >> Theme Options >> Newsletter Settings

In front end, it will look like this.

Our Teachers Settings
Our Teachers Settings
In order to proceed with Our Teachers Settings follow the instructions given below.
In the Dashboard, go to Appearance >> Customize >> Theme Options >> Our Teachers Settings


In front end, it will look like this.

Testimonials Settings
Testimonials Settings
To proceed with Post, you should first choose the post title,featured image choose the category in which you want your post to appear.
Follow the instructions given below to setup Testimonials.
In the Dashboard, go to Testimonial >> Add New Post
You can make multiple posts for Testimonials.
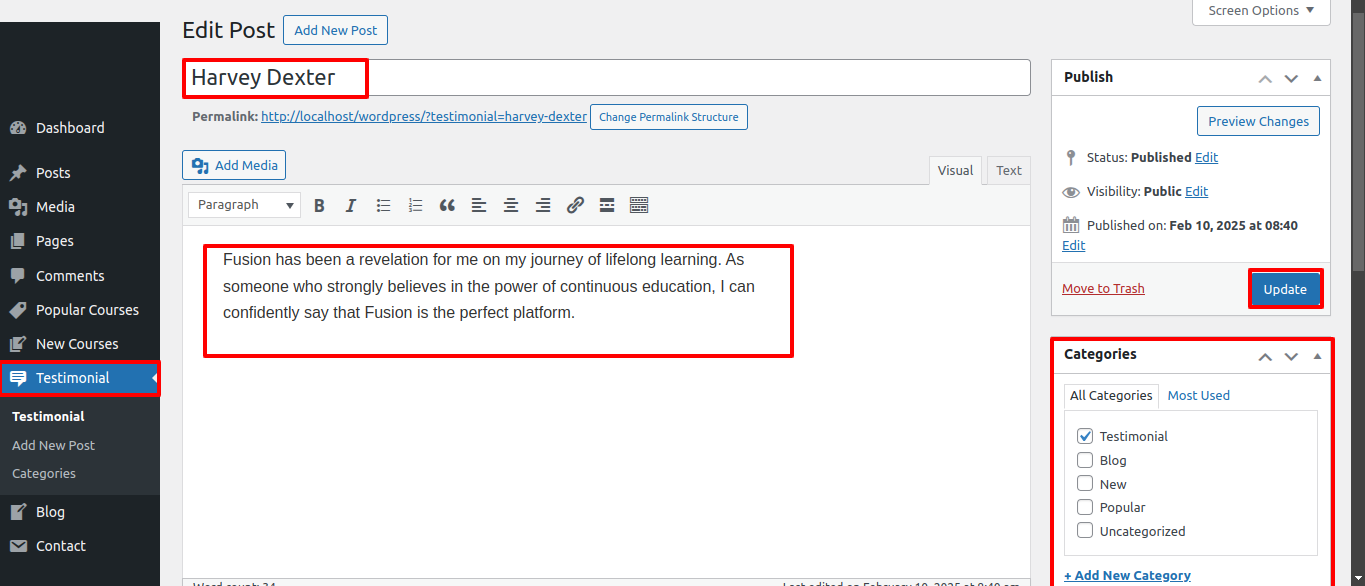
In order to proceed with Testimonials Settings follow the instructions given below.
In the Dashboard, go to Appearance >> Customize >> Theme Options >> Testimonials Settings

In front end, it will look like this.

Video Settings
Video Settings
In order to proceed with Video Settings follow the instructions given below.
In the Dashboard, go to Appearance >> Customize >> Theme Options >> Video Settings

In front end, it will look like this.

Blog Settings
Blog Settings
To proceed with Post, you should first choose the post title,featured image choose the category in which you want your post to appear.
Follow the instructions given below to setup Blog.
In the Dashboard, go to Blog >> Add New Post
You can make multiple posts for Blog.
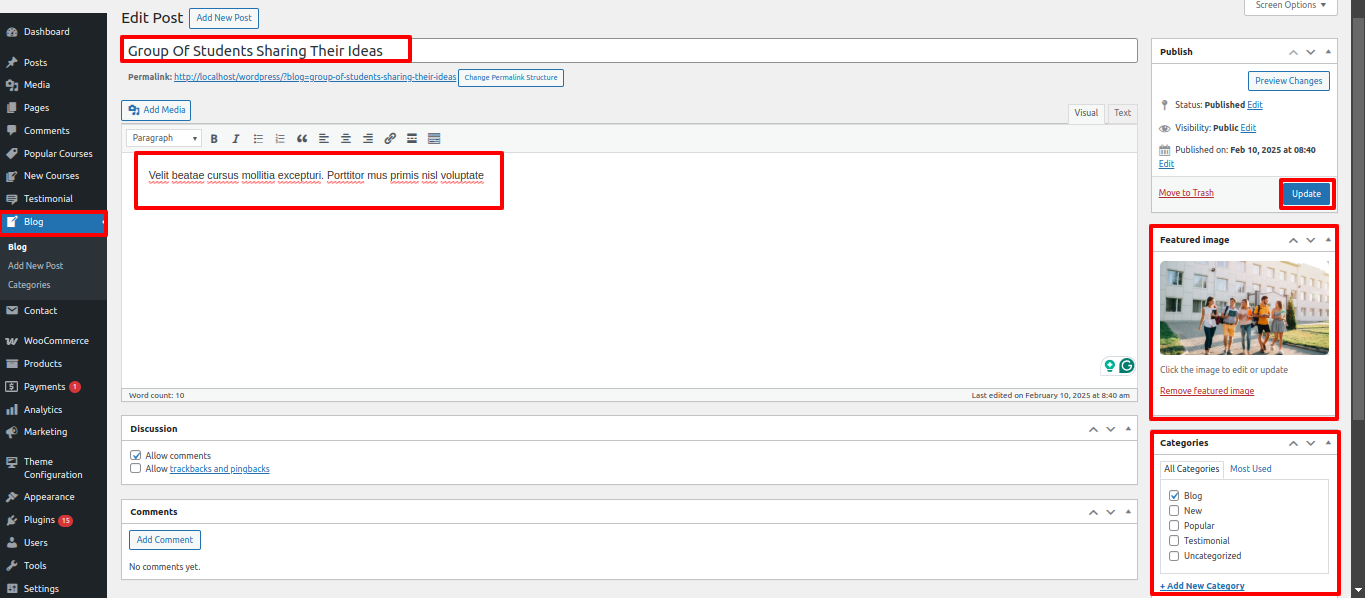
Once you have done with this you will see the post on your front page.
In order to proceed with Blog Settings follow the instructions given below.
In the Dashboard, go to Appearance >> Customize >> Theme Options >> Blog Settings
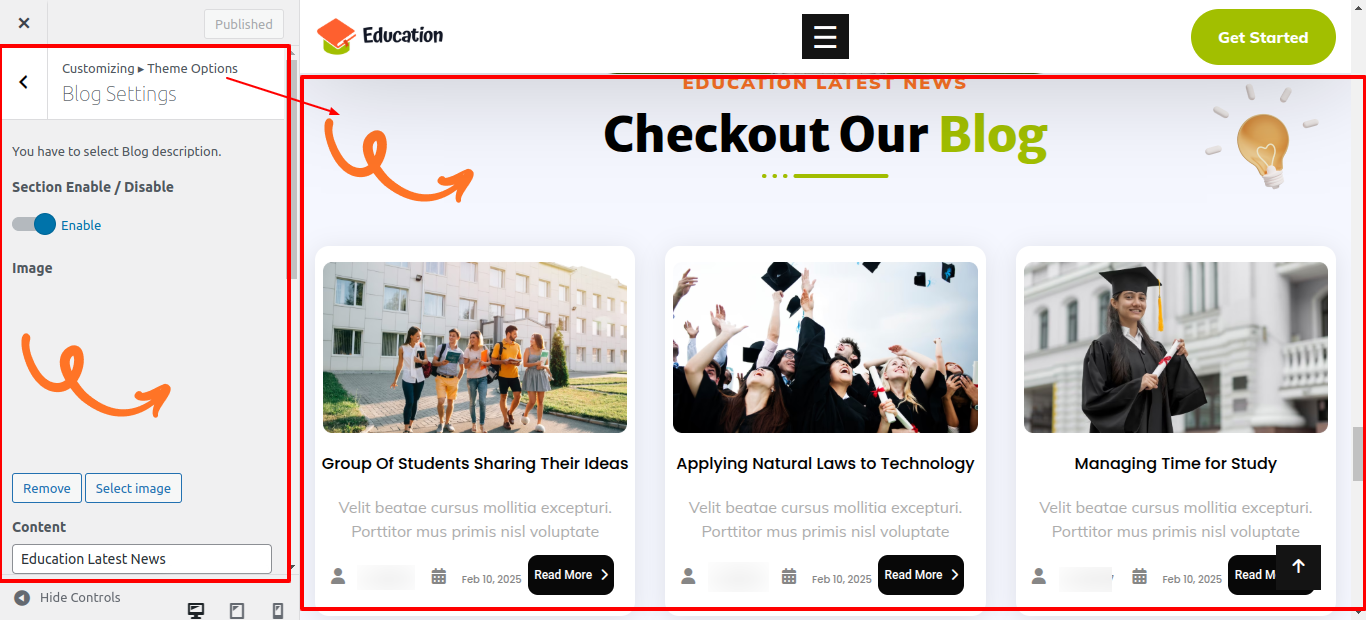
In front end, it will look like this.

Book Your Seat Now Settings
Book Your Seat Now Settings
To proceed with Contact form, you should first install the contact-form-7 plugin.
Follow the instructions given below to setup Book Your Seat Now.
In the Dashboard, go to Contact >> Contact Forms >> Book Your Seat Now

In order to proceed with Book Your Seat Now Settings follow the instructions given below.
In the Dashboard, go to Appearance >> Customize >> Theme Options >> Book Your Seat Now Settings

In front end, it will look like this.

FAQ Settings
FAQ Settings
In order to proceed with FAQ Settings follow the instructions given below.
In the Dashboard, go to Appearance >> Customize >> Theme Options >> FAQ Settings


In front end, it will look like this.

Footer And Copyright Settings
There are four columns in the footer. Any widget can be added there.
1. In the Dashboard, go to Appearance >> Widgets
To add widgets to the footer, see the screenshot below.

You can add footer columns by selecting widgets such as text, images, Recent posts and so on, which allow you to quickly add text or images of your choice.
In order to manage content for footer and add some widgets, navigate to, follow the instructions given below.
2. In the Dashboard, go to Appearance >> Widgets >> Footer Sidebar

3. In the Dashboard, go to Appearance >> Customize >> Theme Options >> Footer And Copyright Settings

In front end, it will look like this.

Theme Color / Font Option
Setup Background
Background Settings
In order to proceed with Background Settings follow the instructions given below.
In the Dashboard, go to Appearance >> Customize >> Theme Options >> Background Settings >> Library Section
You can set background color for section. You can choose from this options for each Background Section.

In front end, it will look like this.

Setup Theme Font Style
Typography Options
In order to proceed with Typography Options, you can change complete font style just one click. follow the instructions given below.
You can change heading and body font style
In the Dashboard, go to Appearance >> Customize >> Typography Options

In front end, it will look like this.

Setup Theme Color
Color Options
In order to proceed with theme color option, you can change complete font color and button background and border color on just one click. follow the instructions given below.
In the Dashboard, go to Appearance >> Customize >> Theme Color Option

In front end, it will look like this.

Page Templates Settings
Setup Contact Page -
Follow these instructions to setup contact page.
Make a page to set the template: In dashboard, click on Pages >> Add New Page
Name it "Contact" or whatever you want. Then, from the template dropdown, select the "contact page template."
The Page Attributes section provides your page a parent page and a template.

How to Construct a Contact Form -
The Contact Form 7 plugin is installed in the usual way. Click Plugins > Add New in the WordPress dashboard and type Contact Form 7 in the Search box. From the search result, select the plugin and click the Install Now option.
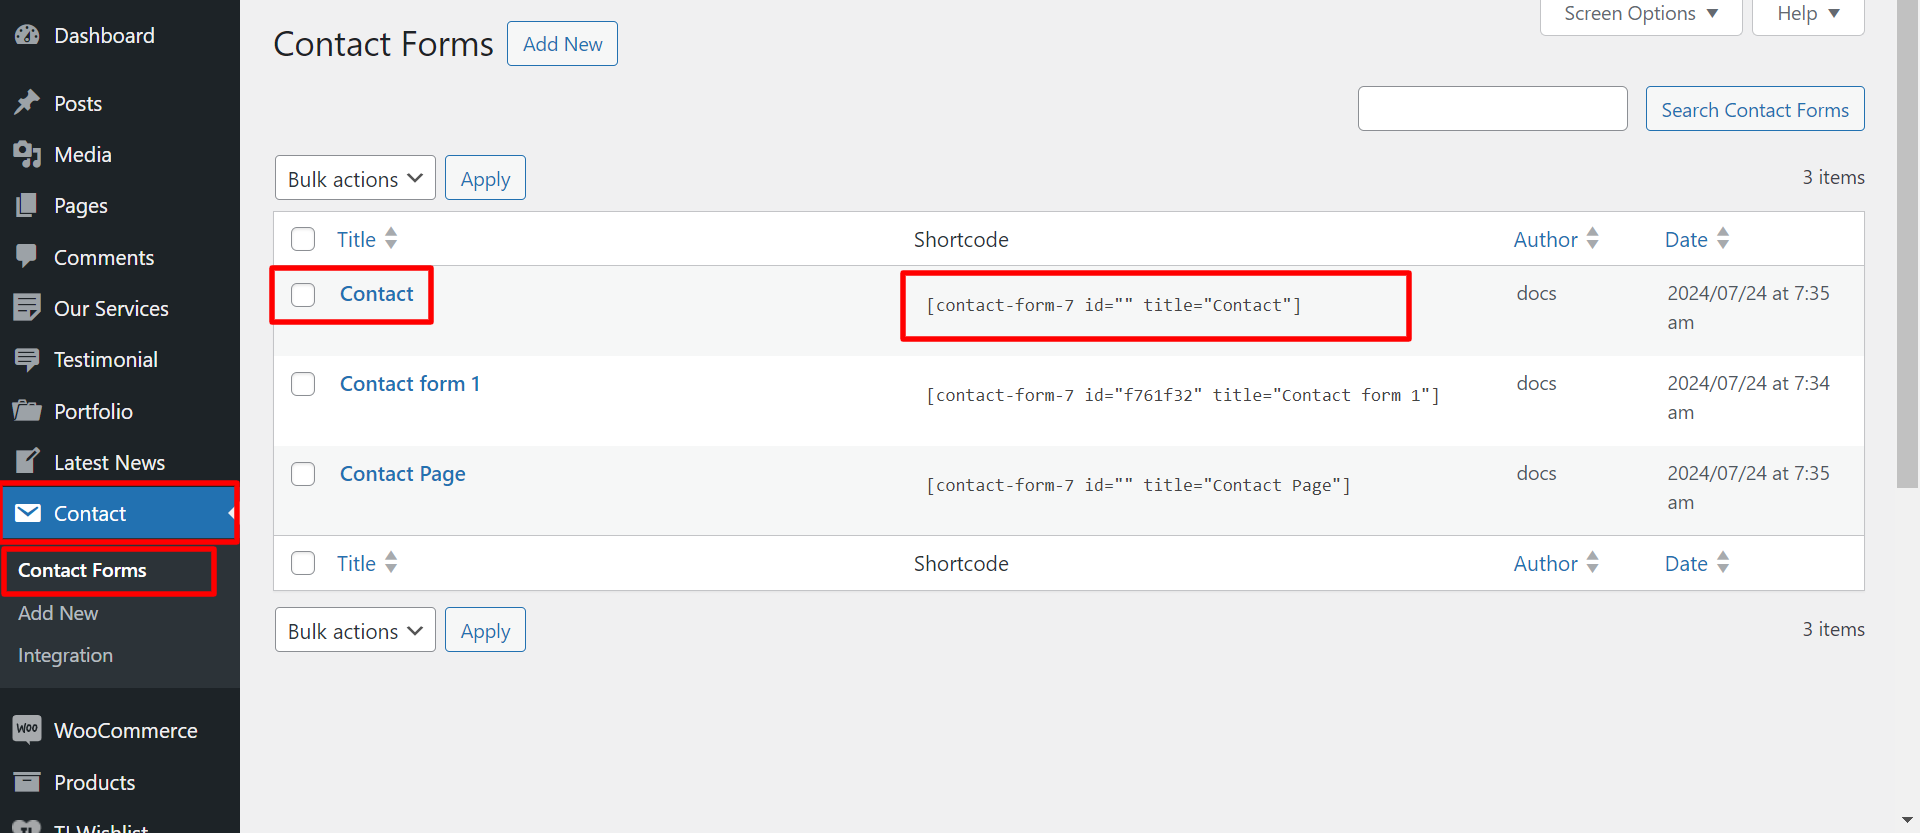
From the admin panel, just go to Contact > Contact Forms to create a Contact Form. There is a list of the forms that are available, though there are none, at now
You may also create your own contact form by clicking on the Contact >> Add New
Building a new form of contact -
Scroll to Form and give this new contact form a name. You can make modifications to contact form template from here.
The multiple fields which will display on your form, as well as the labels that will be next to those fields, are defined by the template.

When you are done with changes, click Save.
A key step is to copy the Shortcode that displays next to your contact form. This is displayed in the form editor as well.
Contact Form Section
In the Dashboard, go to Appearance >> Customize >> Contact Page Settings >> Contact Form Section
Place the Contact Form-7 shortcode code in customize option.

In the Dashboard, go to Appearance >> Customize >> Contact Page Settings >> Location Section
You can set location. You can choose from this options for each Location Section.

In the Dashboard, go to Appearance >> Customize >> Contact Page Settings >> Enquiry Section
You can set time, location, contact. You can choose from this options for each Enquiry Section.

In front end, it will look like this.

Setup Blog Page
Set Up Post Right Sidebar
Follow these instructions to setup post right sidebar page.
1. Make a page to set the template: Go to Dashboard >> Pages >> Add New Page

Caption it "Post Right Sidebar" or anything you want to. Then, from the template dropdown, chose "Post Right Sidebar.
The options of this page template (like sections content, images and number of posts they display) can be controlled it.
The Page Attributes section provides your page a parent page and a template.
1. Make a page to set the template: In dashboard, click on Pages >> Add New Page

In front end, it will look like this.

Set Up Post Left Sidebar
Follow these instructions to setup post left sidebar page.
1. Make a page to set the template: In the Dashboard, go to Pages >> Add New Page
Title it "Post Left Sidebar" or anything you like. Then, from the template dropdown, pick "Post Left Sidebar".
The options of this page template (like sections content, images and number of posts they display) can be controlled it.
The Page Attributes section provides your page a parent page and a template.
1. Make a page to set the template: In dashboard, click on Pages >> Add New Page

In front end, it will look like this.

Setup Page Template
Set Up Page Right Sidebar
Follow these instructions to setup page right sidebar page.
1. Make a page to set the template: In the Dashboard, go to Pages >> Add New Page
"Label it "Page Right Sidebar" or anything as you like". Then, from the template choices, select "Page Right Sidebar".
The options of this page template (like sections content, images and number of posts they display) can be controlled it.
The Page Attributes section provides your page a parent page and a template.
1. Make a page to set the template:In dashboard, click on Pages >> Add New Page

In front end, it will look like this.

Set Up Page Left Sidebar
Follow these instructions to setup page left sidebar page.
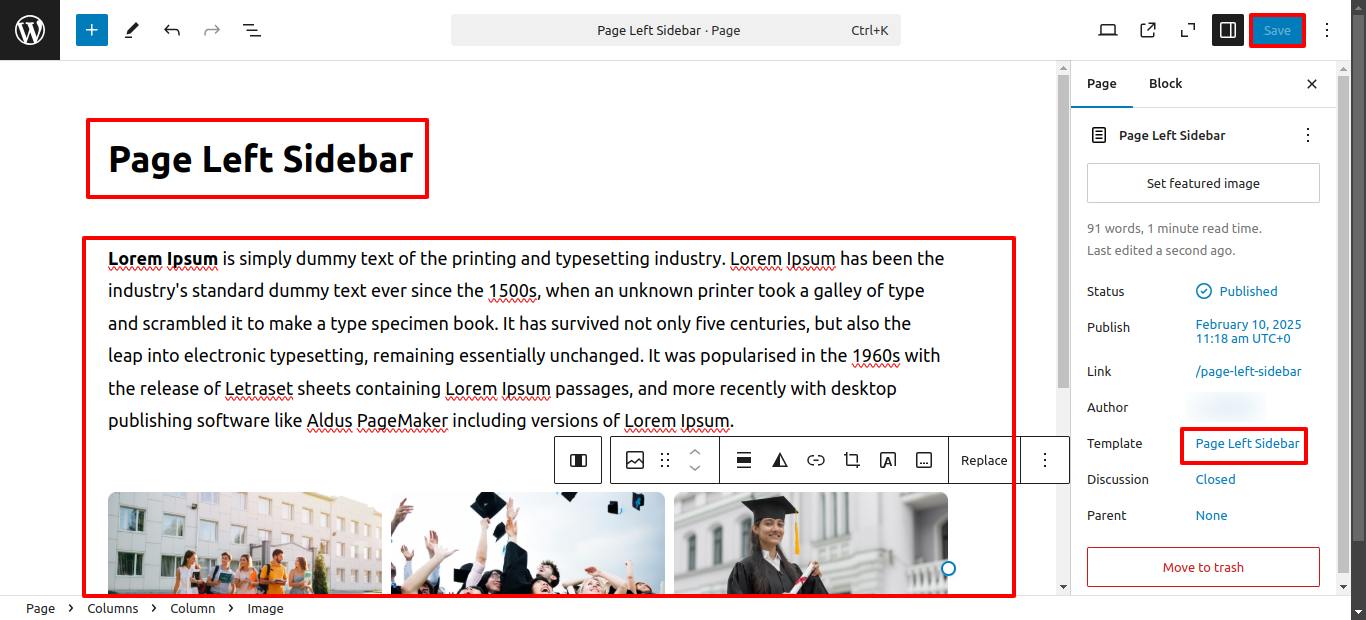
1. Make a page to set the template: In the Dashboard, go to Pages >> Add New Page
Label it "Page Left Sidebar" or anything as you want. Then, from the template choices, select "Page Left Sidebar.
The options of this page template (like sections content, images and number of posts they display) can be controlled it.
The Page Attributes section provides your page a parent page and a template.
1. Make a page to set the template: In dashboard, click on Pages >> Add New Page
In front end, it will look like this.

Theme Post & Page Settings
Post Admin, Comments and Date settings
Post Admin, Comments and Date settings
In order to proceed with Post Admin, Comments and Date settings follow the instructions given below.
In the Dashboard, go to Appearance >> Customize >> Theme Options >> Post Settings
You can Enable / Disable post of admin, comments and date. You can choose from this options for each Post Settings.
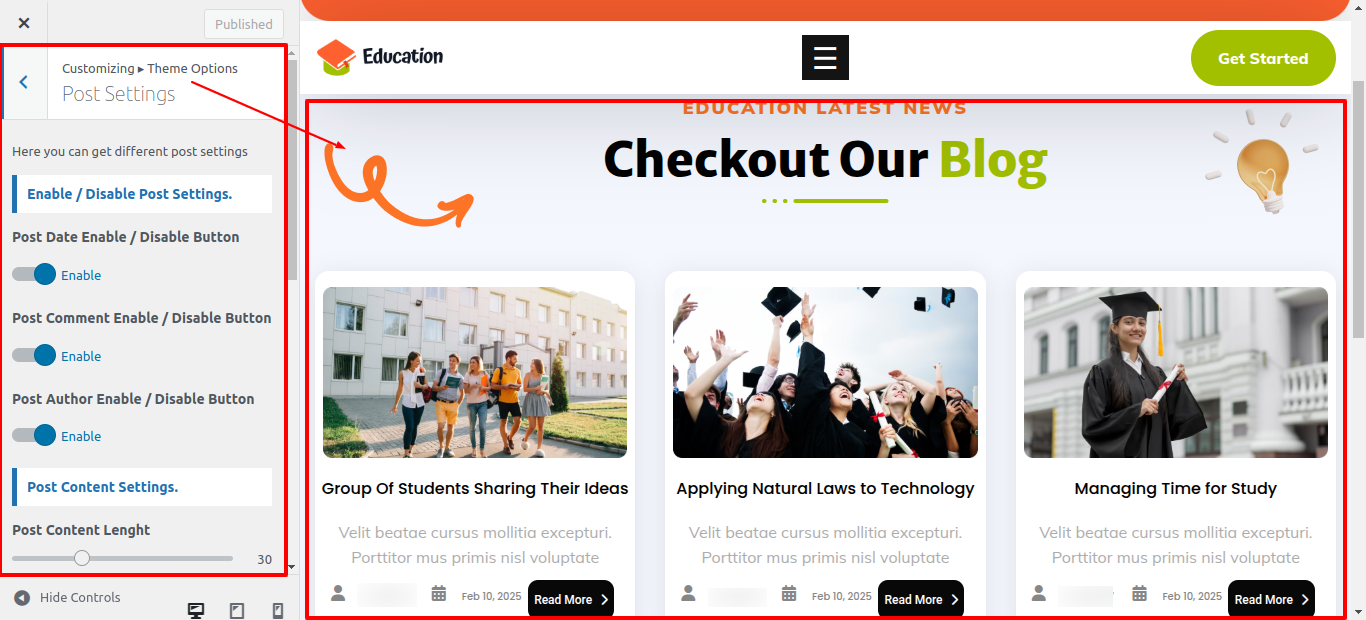
In front end, it will look like this.

Post Content Settings
Post Content Settings
In order to proceed with you can set post content lenght, follow the instructions given below.
In the Dashboard, go to Appearance >> Customize >> Theme Options >> Post Settings
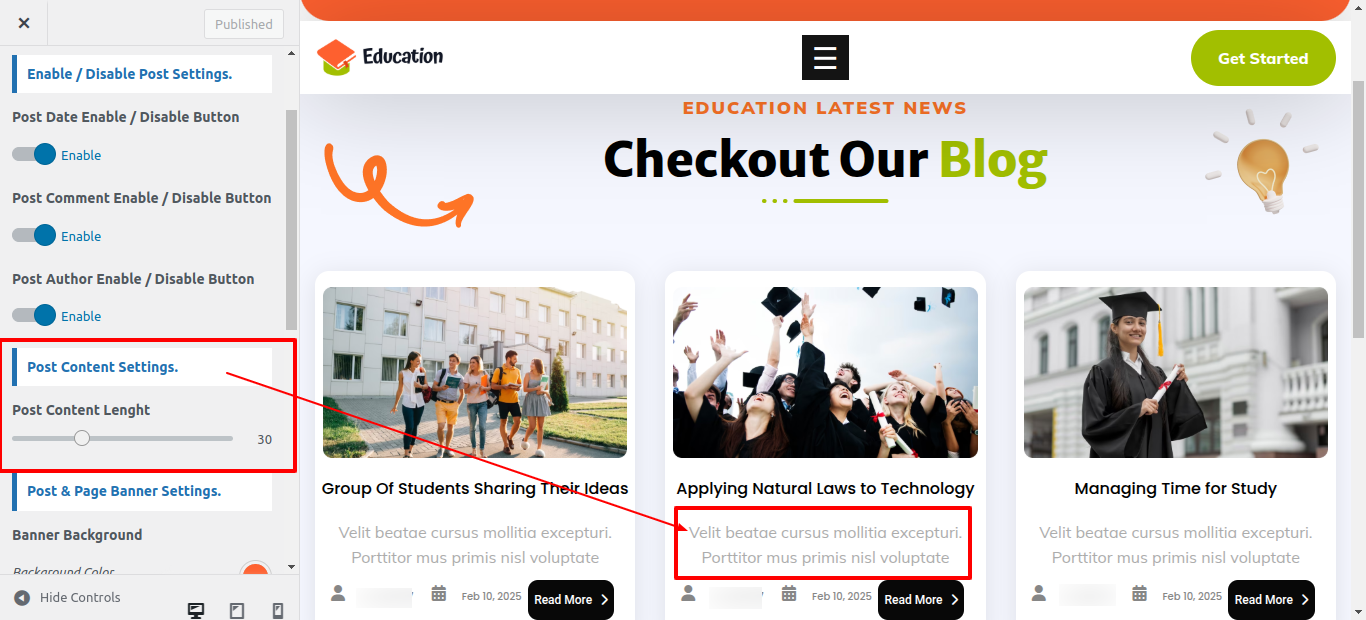
In front end, it will look like this.

Post and Page Banner Settings
Post and Page Banner Settings
In order to proceed with you can change banner background image and color . follow the instructions given below.
You can change also page and poste title color. You can choose from this options for each Post Settings.
In the Dashboard, go to Appearance >> Customize >> Theme WooCommerce Settings >> WooCommerce Page Layout

In front end, it will look like this.
