Real Estate Property Free Documentation
The documentation for your awesome theme or template
Introduction
- Theme Name : Real Estate Property
- Author : mishkatwp
- Support Forum : https://wordpress.org/support/theme/real-estate-property/
- License : GNU General Public License v3 or later
- Discription : The Property WordPress Theme stands as a pinnacle in the realm of real estate website design, offering an unparalleled blend of sophistication, functionality, and versatility. Tailored for discerning real estate professionals, agencies, and property enthusiasts, this premium theme goes beyond the ordinary to provide an exceptional online platform for showcasing properties and connecting with potential buyers. Crafted with precision and attention to detail, the Property WordPress Theme is designed for those who seek a top-tier solution for their real estate venture. It caters to a diverse audience, including real estate agents, agencies, property developers, and individuals with a portfolio of premium properties. Whether you’re looking to market luxury estates, commercial spaces, or high-end residential properties, this premium theme is a robust and customizable choice. At its core, this premium theme is a strategic investment for those who understand the importance of a polished online presence. The premium designation signifies a commitment to excellence, offering users a level of quality and functionality that goes beyond what’s available with free alternatives. The Property WordPress Theme is a tool for professionals who recognize the impact of a well-designed website in capturing the attention of potential clients and setting themselves apart in a competitive market.
Establishing the Theme
Configure Theme
You can also install your theme through the WP Admin interface
To begin, access your WordPress admin area by logging in. Once logged in, navigate to the desired task by clicking on...
1. In dashboard click on Appearance >> Themes
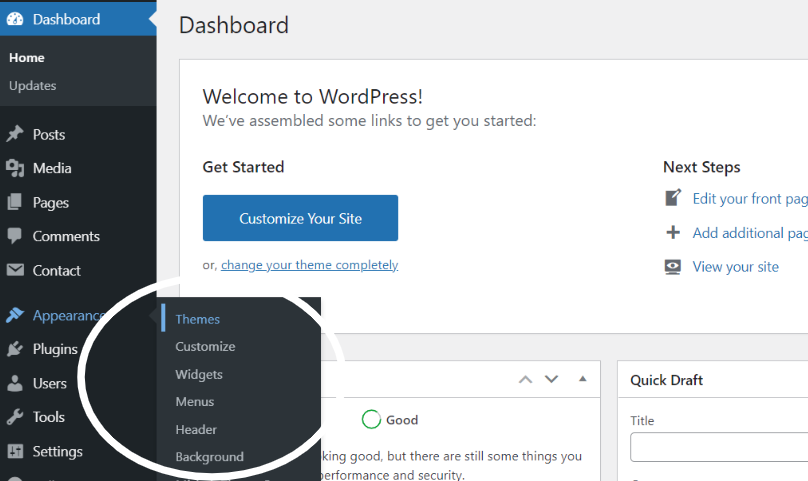
2. Once the page has finished loading, direct your attention to the top of the themes page. Locate the prominent "Add New" button and proceed to click on it. This action will initiate the process of adding a new theme to your WordPress site.

3. Click on the button labeled as 'Upload Theme'.

Select the "real-estate-property.zip" theme from Browse button, and after that select "Install Now."

5. After successfully installing your theme, WordPress will display success message and a link to activate or view a live preview of it. You've done a great job installing your theme!
Configure Home Page
The options of this page template (like sections location, disabling sections, number of posts they display) can be controlled it.
To design a home page, follow these steps.
1. Make a page to set the template: visit Dashboard Pages -- Add New Page
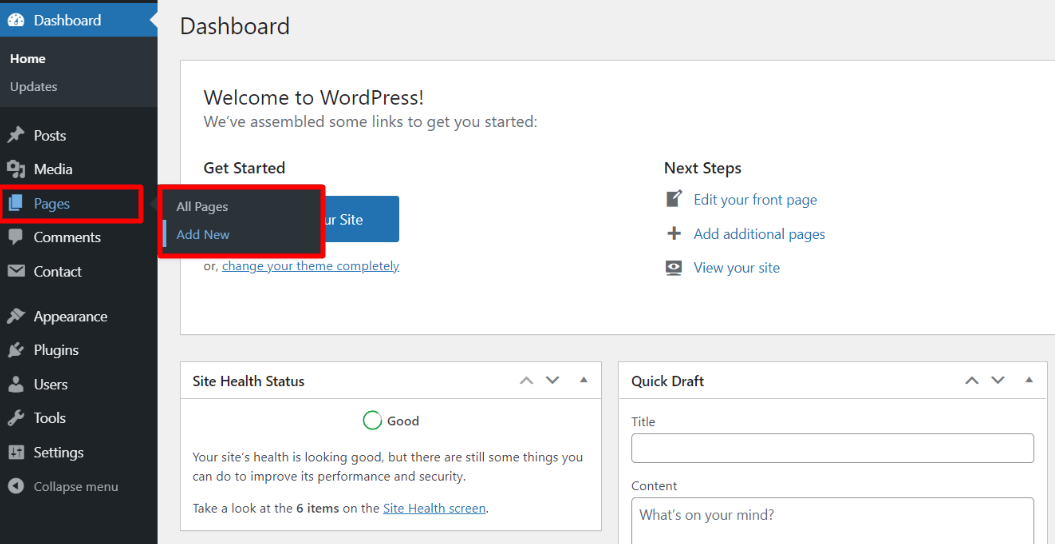
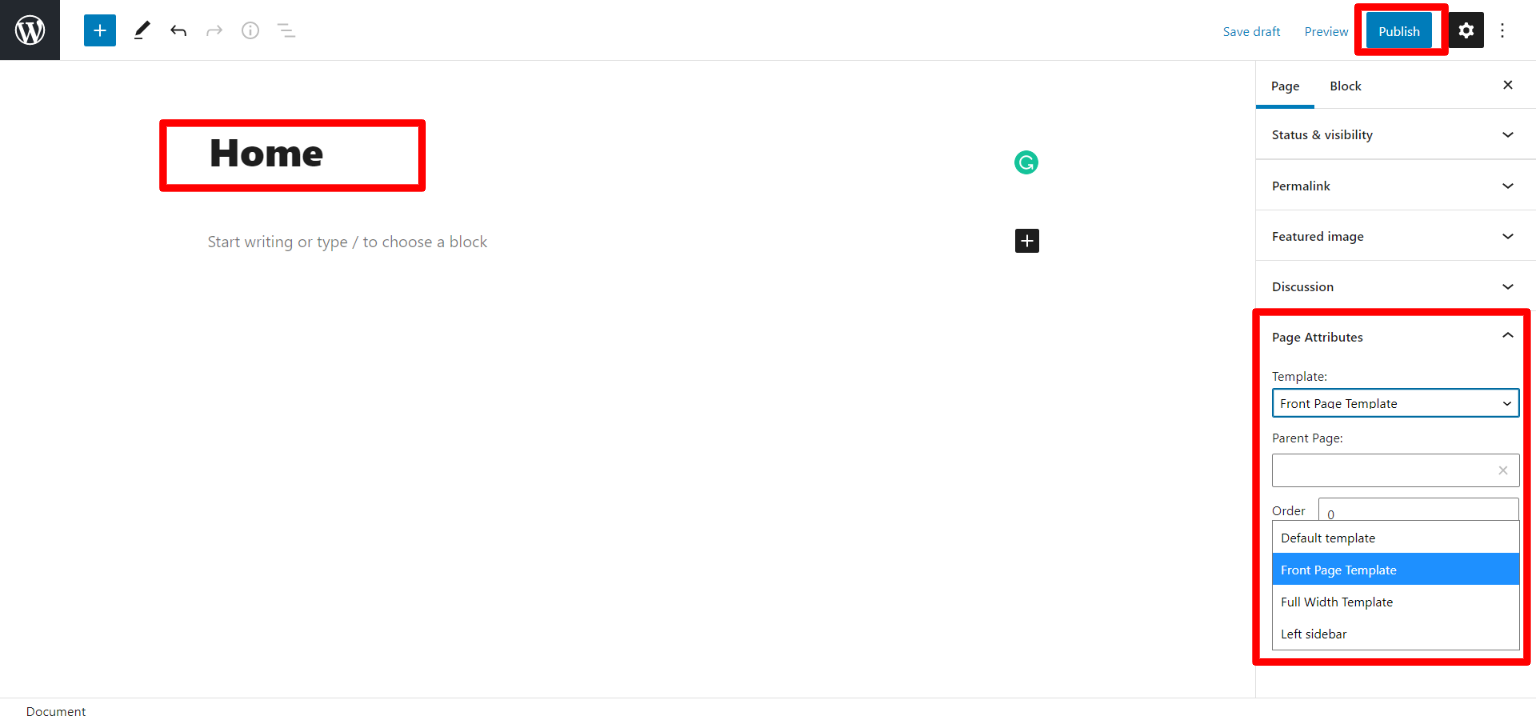
Name it "home" or anything as you like. Then, from the template dropdown, pick "front page template".
The Page Attributes section provides your page a parent page and a template.
1. Make a page to set the template: Go to Dashboard Pages -- Add New Page
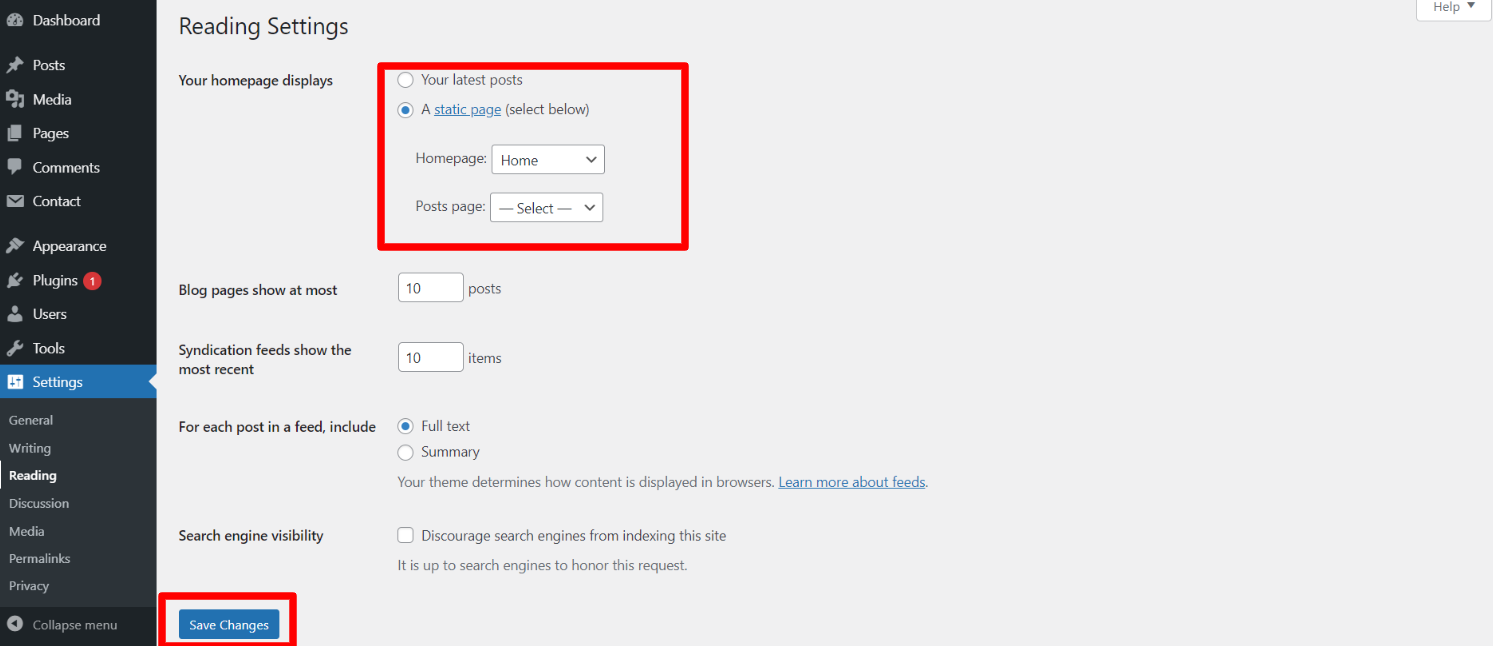
Design front page as follows: Visit Setting -- Reading -- To set the home page as a static page for your website
All of the demo content will be visible on top page once you're done.
Essential Plugins
When you initially activate the theme, you'll be asked to install these plugins on your Dashboard. You can ignore the message if you don't want to install these plugins on theme activation, and if you change your mind later, you can install them manually.
In the Dashboard, click on Plugins >> Install Plugins.
Kirki
Plugin download link kirki
Configure Menu
Configure Menu
In the dashboard, visit Appearance >> Menu
To access the Menu Editor, visit the Dashboard and click on the 'Appearance' menu on the left-hand side. From there, select the 'Menus' option.
To create a new menu, follow these steps:At the top of the page, select "Create a new menu".Enter a name for your new menu in the "Menu Name" box.Click on the "Create Menu" button.
Your new custom menu has been successfully created.
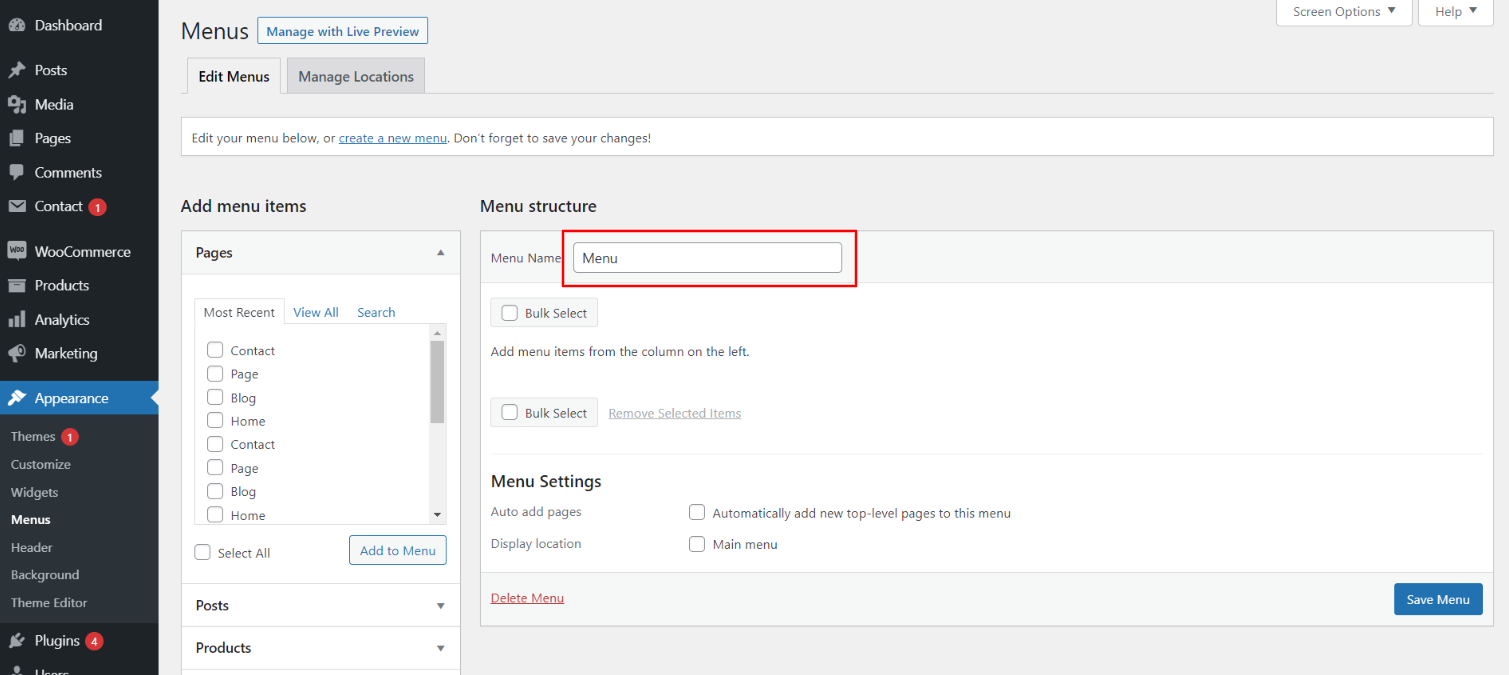
To add items to your menu
In the Menu Editor, locate the section labeled "Pages"
Click the checkbox next to each page's title that you want to add.
Once you have selected the desired pages, click the "Add to Menu" button.
Custom menu has been successfully saved
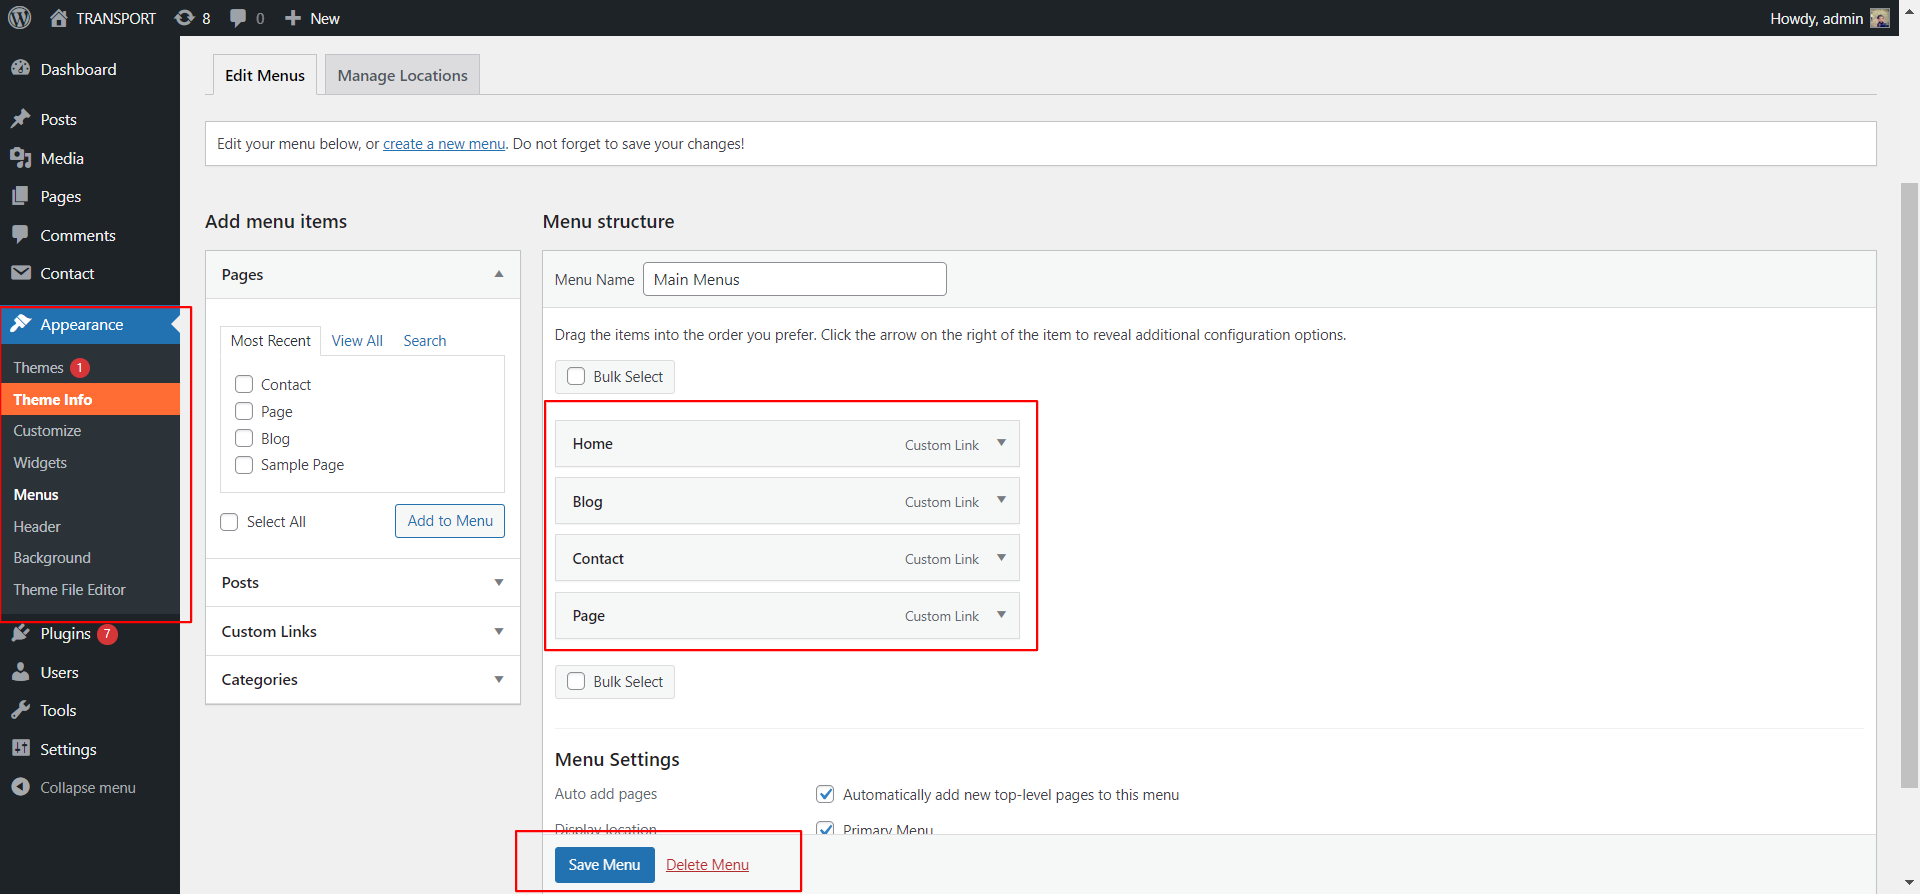
On the front end, the menu will appear as follows.

Real Estate Property Theme Configure
Logo Configure
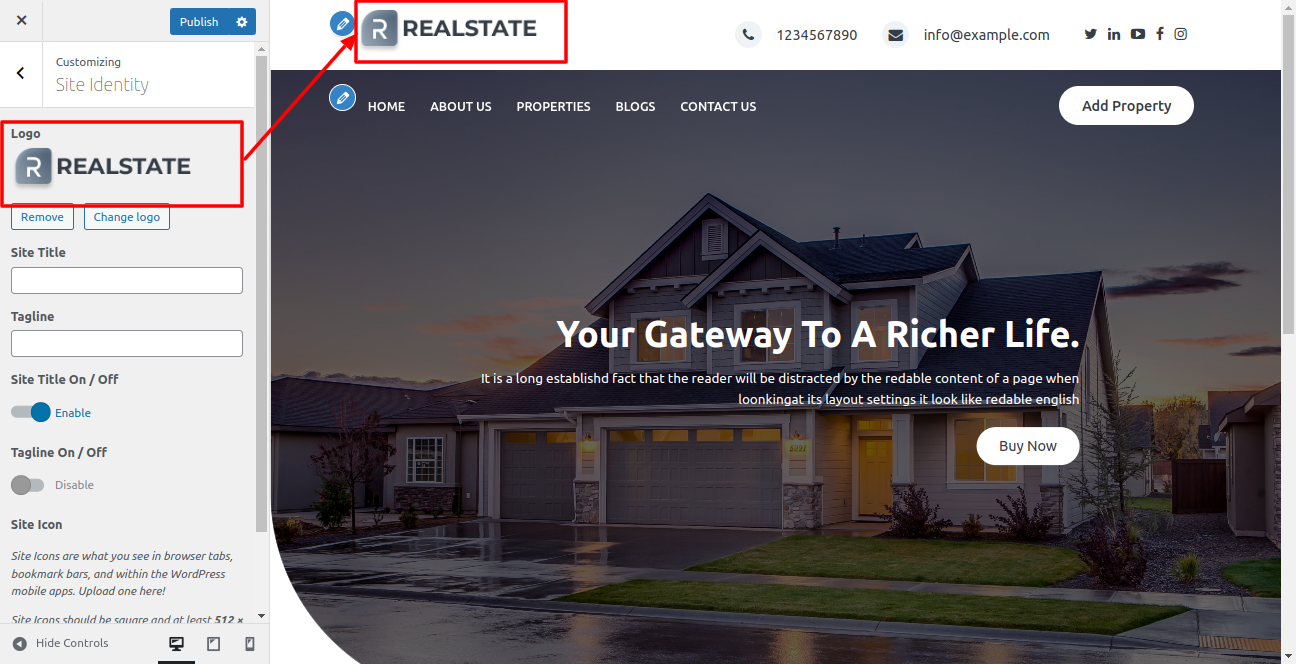
Proceed with Theme Logo setup, you can set site title and tagline, proceed as described below.
In the dashboard, visit Appearance -- Customize -- Site Identity -- Set Title and Tagline You can also make the tagline hidden.
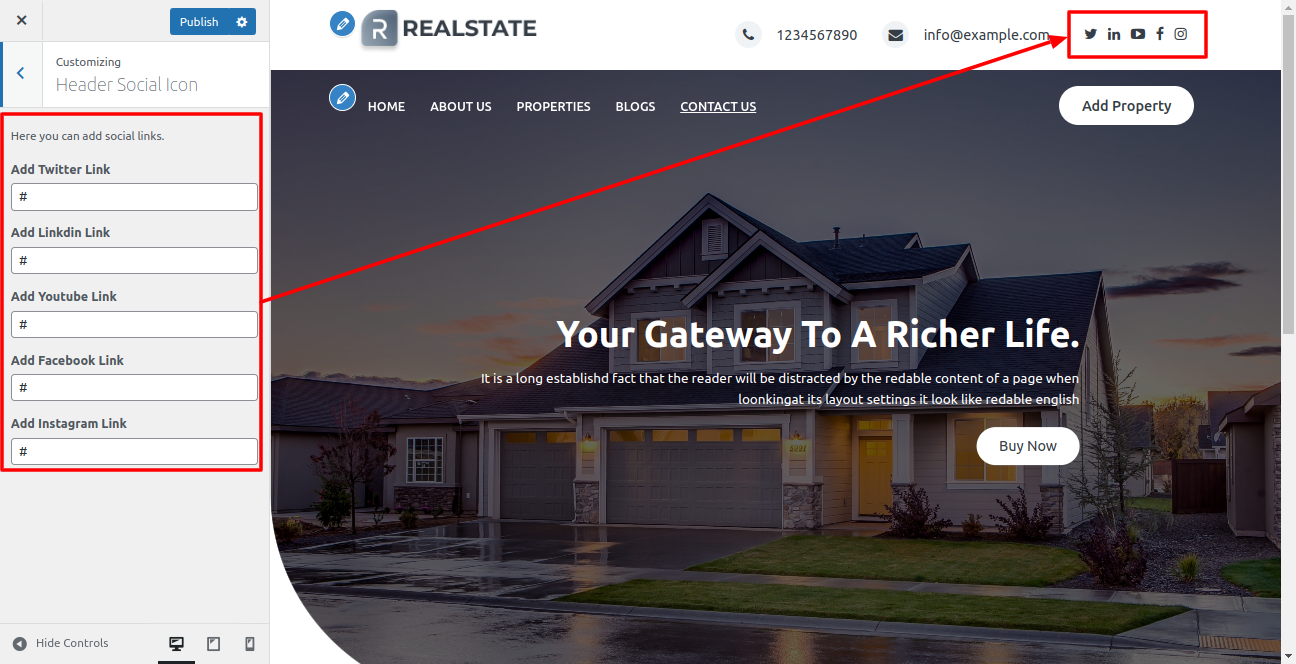
Top Header Social Links
Proceed with Header Social Links, so proceed as described below.
In the dashboard, visit Appearance -- Customize -- Top Header Social Links
You can set Header text. You can set social url.
Header Button and Conatct Section
Proceed with Header Button, so proceed as described below.
In the dashboard, visit Appearance -- Customize -- Header
You can set Header conatct number, email address and location. You can button text and button url.
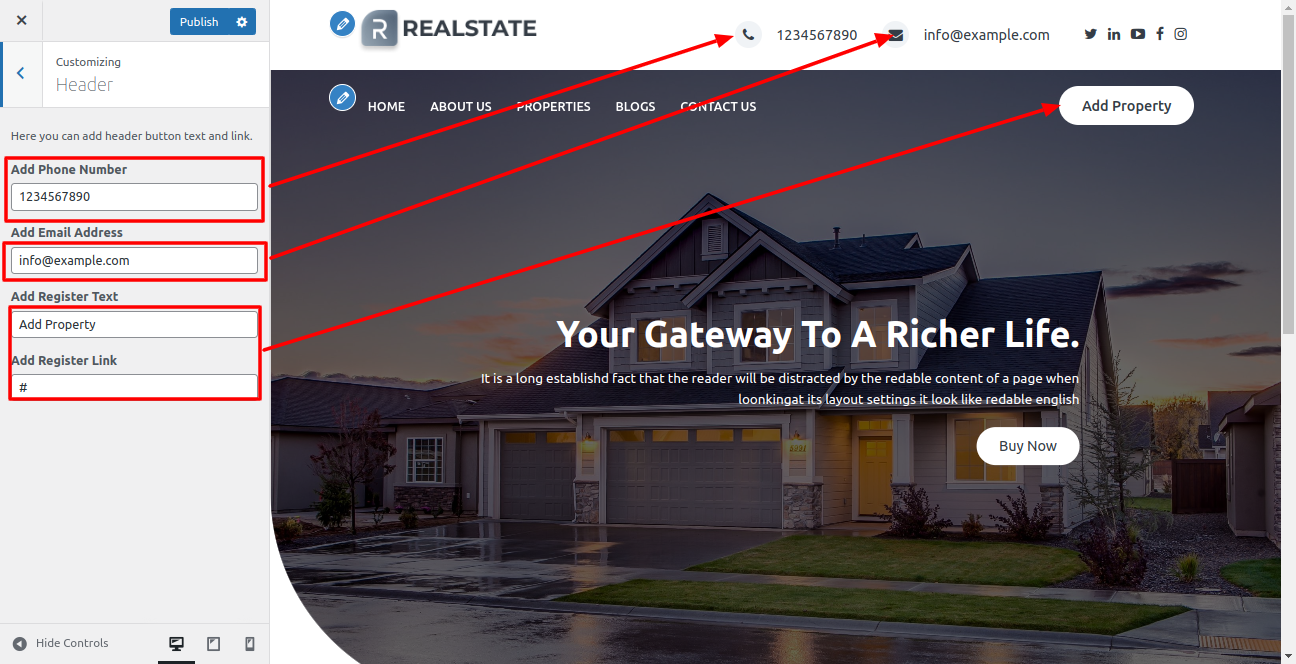
On the front end, the appearance will resemble the following.

Home Slider Section
Proceed with Theme Slider Settings , you can set slide show , proceed as described below.
In the dashboard, visit Appearance -- Customize -- Home Slider
Select number slides to show, then select image for the slide
Set all the details which is required for slider
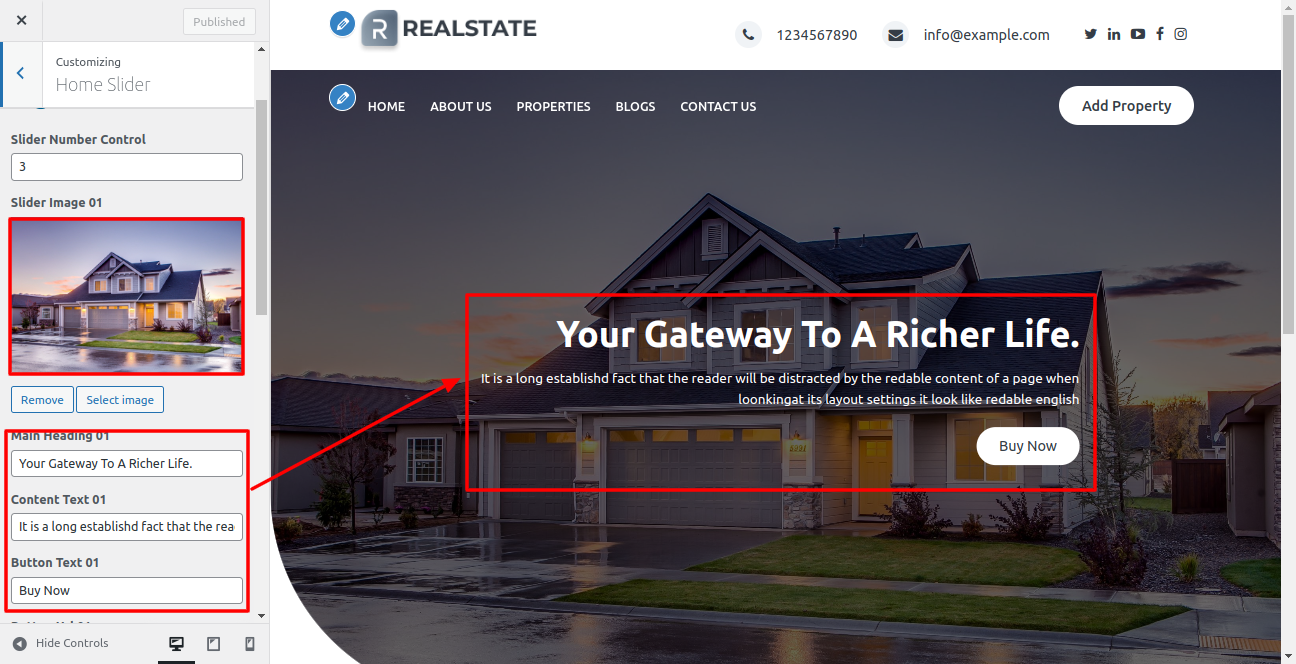
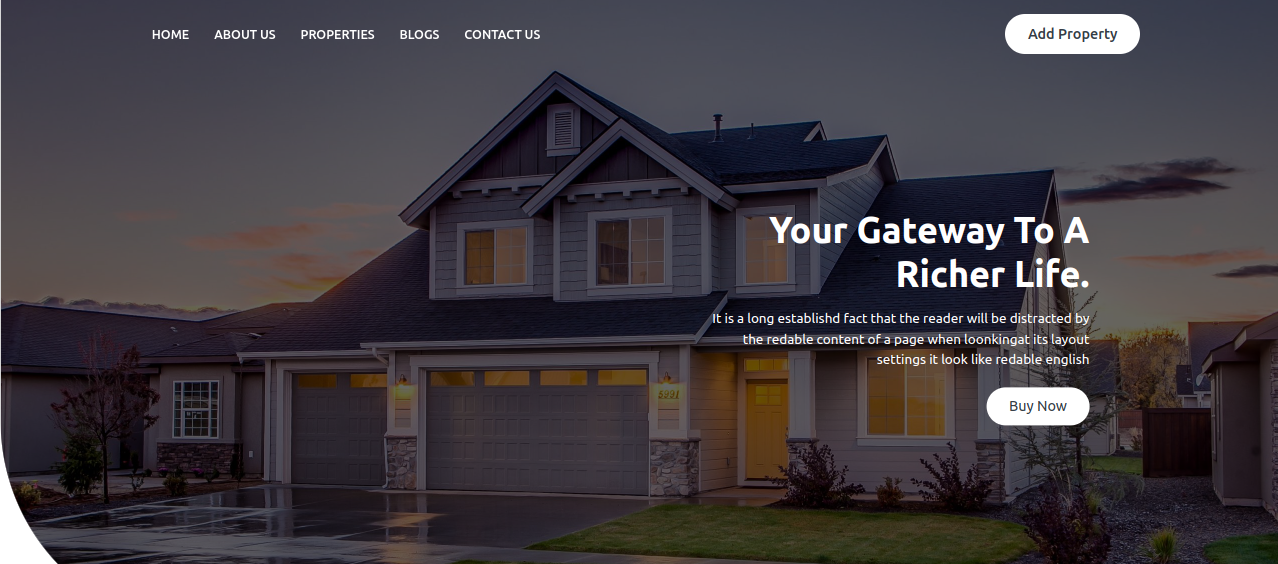
On the front end, the appearance will resemble the following.
Project Section
Proceed with Theme Services Settings proceed as described below.
In the dashboard, visit Appearance -- Customize -- Home Projects
Select number services to show, then select image for the services
Set all the details which is required for services
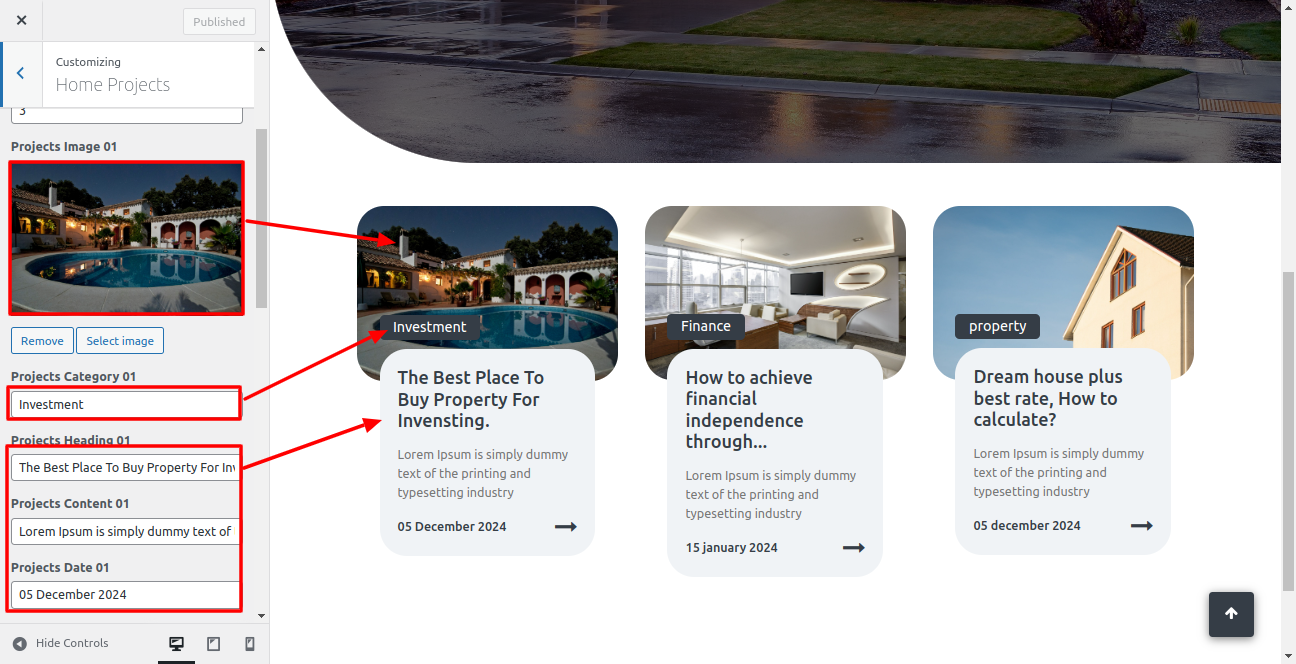
On the front end, the appearance will resemble the following.

Configure Footer Section
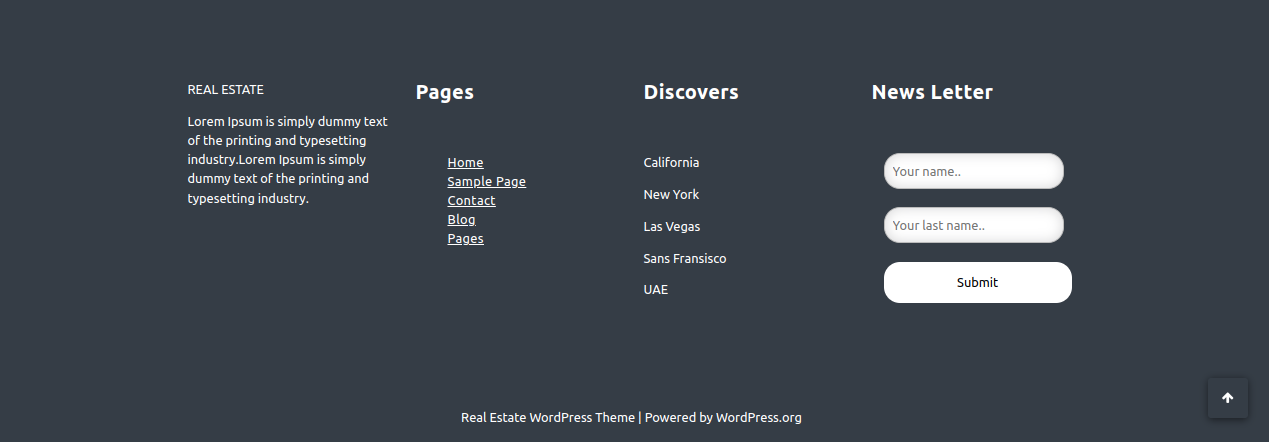
There are four columns in the footer. Any widget can be added there.
1. In the dashboard, visit Appearance -- Widgets
To add widgets to the footer, see the screenshot below.
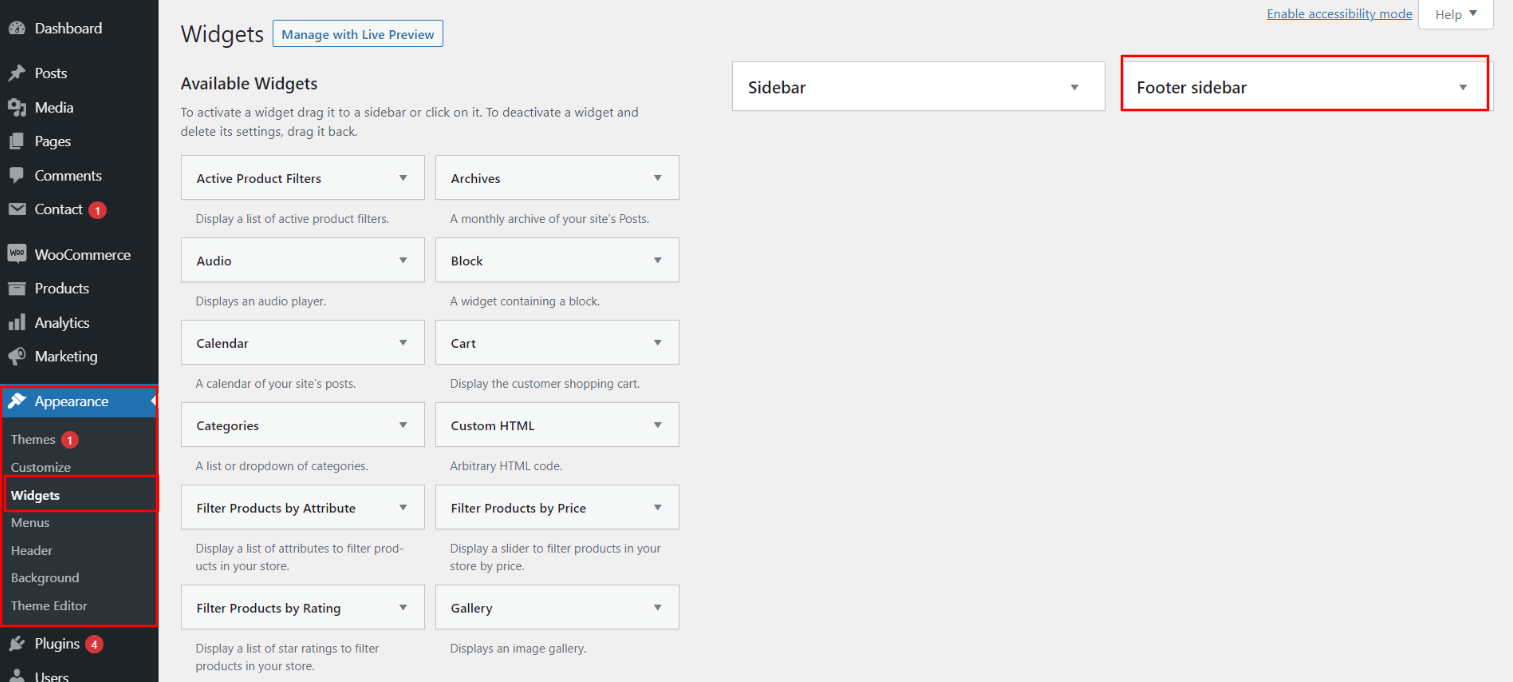
You can add footer coloumns, for that you need to select widgets like text, image, gallery, etc which allows you to add text or image as per your choice with ease.
Proceed with manage content for footer and add some widgets, navigate to, proceed as described below.
2. In the dashboard, visit Appearance -- Widgets -- Footer Sidebar
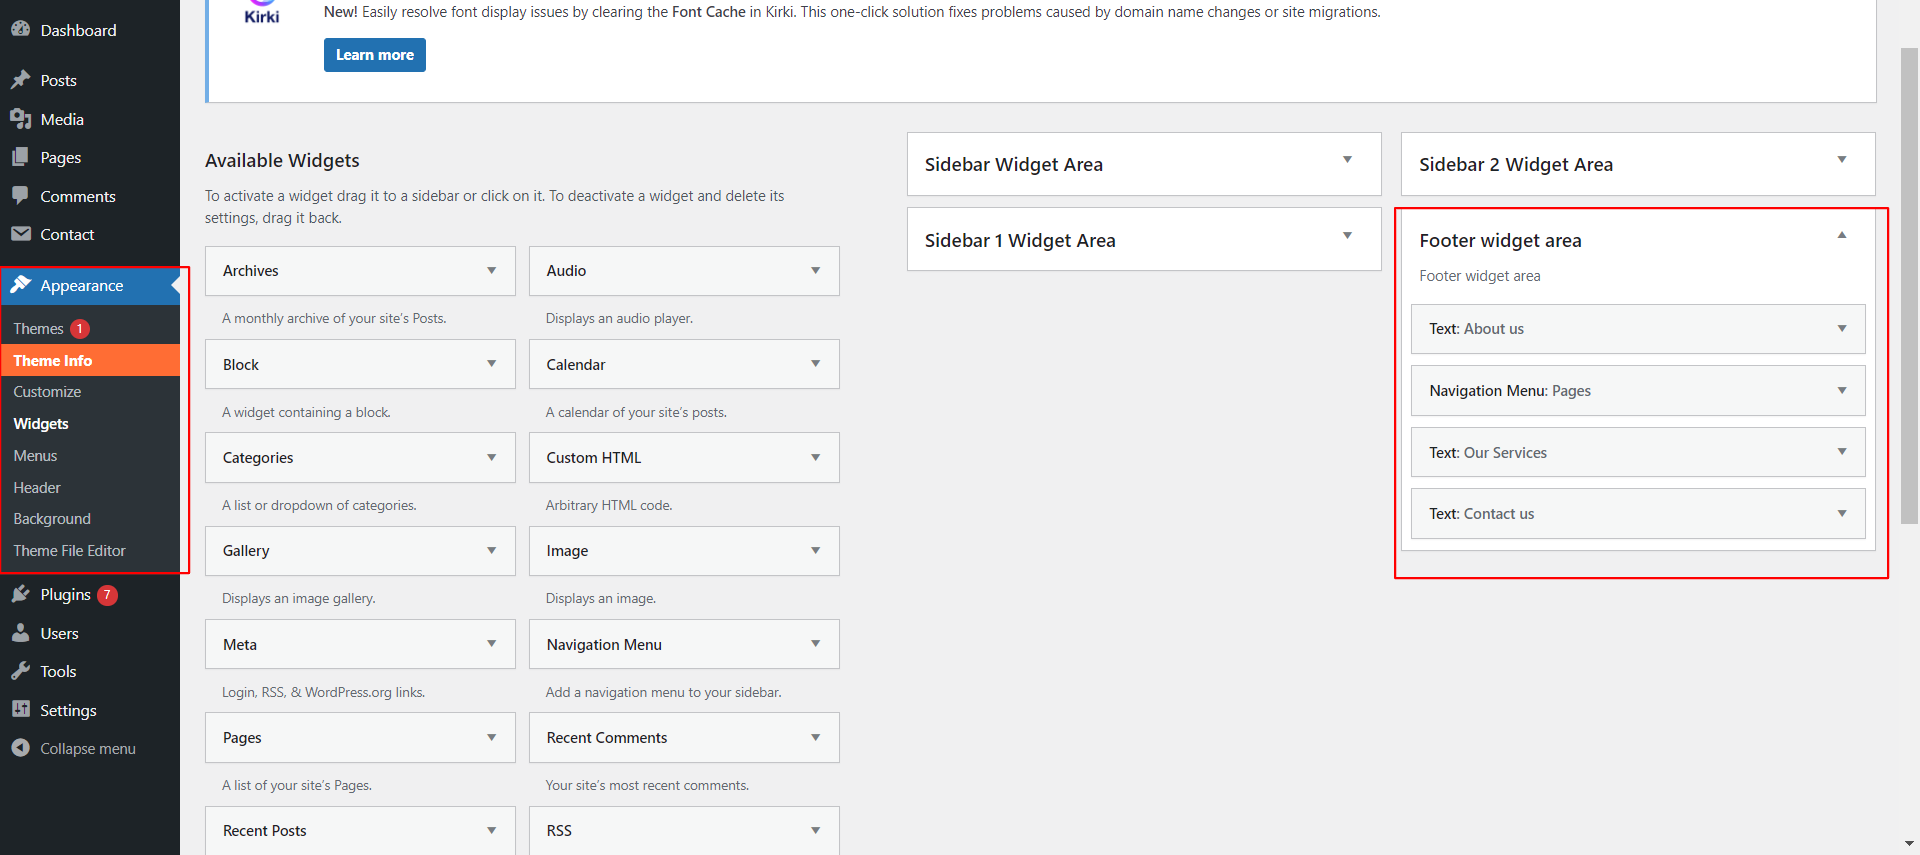
Your footer will appear like this once you have added widgets to it.
Footer Copyright Text
Proceed with footer Settings, You can fill the copyright content to footer copyright Settings.
5. In the dashboard, visit Appearance -- Customize -- Footer
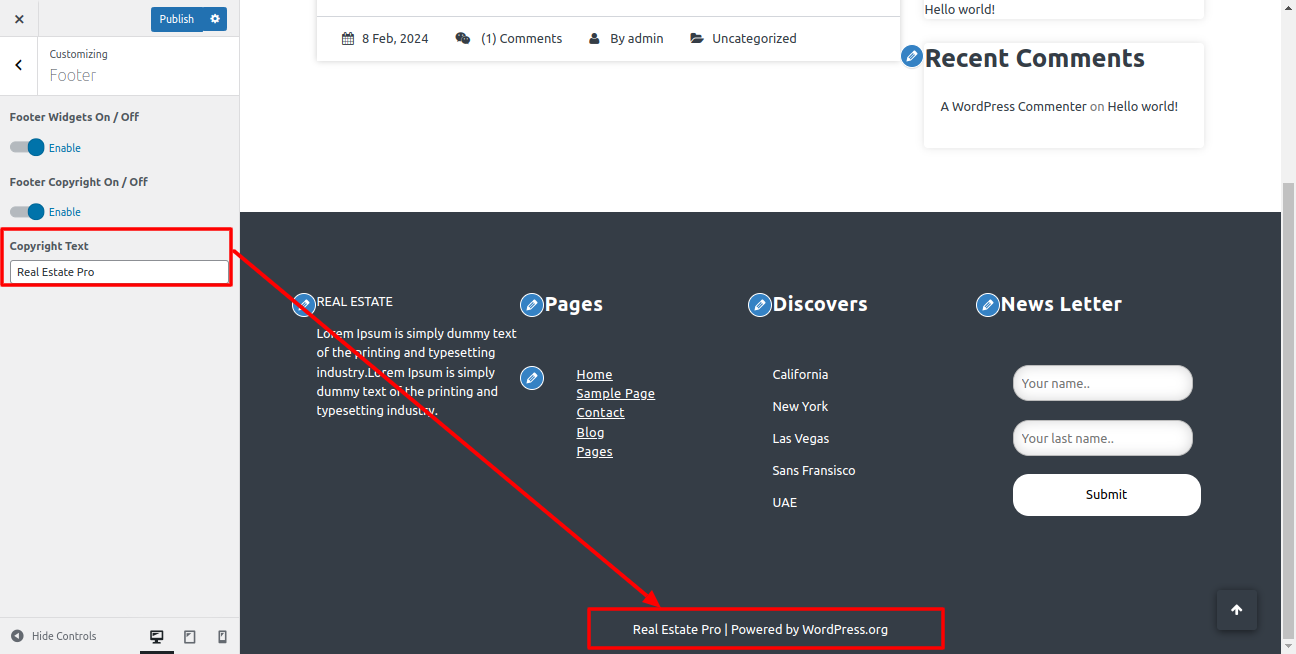
On the front end, the appearance will resemble the following.
